
Sign up to Gali AI if you are a new user, or log in to your account. Yes, that was easy. Congrats 🎉🎉🎉
From the Chatbot List, click on '+ Create Chatbot.'
Choose a name that will be used only internally in your dashboard, and should help you recall what this chatbot is about. For example, 'Widget Homepage' or 'iFrame FAQ Page,' etc. You will be able to change the name anytime from the 'Settings.
Engine Model: Here, you have to decide which engine model to use. We currently offer
- GPT-3.5: Basic GPT-3.5 with a normal number of sources. One message uses 1 credit. This is the standard model and is capable of answering most common questions. Perfect if you don't have complex questions and require easy, light documentation. A great starting point! [Exact model name: gpt-3.5-turbo-1106]
- GPT-3.5 (3x sources): The same engine model as GPT-3.5, but retrieves three times more sources. One message uses 2 credits. This model is particularly useful if you load a lot of documents. This model works particularly well with the "Advanced Source Retrieval"–read below. [Exact model name: gpt-3.5-turbo-1106]
- GPT-4: The latest and most advanced LLM released by OpenAI. One message uses 6 credits. It is much more reliable and accurate in following your prompts, but it's a bit slower and consumes more credits. If you need very accurate answers and want to adhere strictly to the prompt, this is the model to choose. [Exact model name: gpt-4-1106-preview]
- GPT-4 (3x sources): The same model as the GPT-4. One message uses 10 credits. This model is particularly useful if you load a lot of documents. Combining the additional sources with the GPT-4 experience, this is the most advanced engine model we currently offer. [Exact model name: gpt-4-1106-preview]
Source Retrieval Mode:
- Base Source Retrieval: This is the standard system for retrieving sources. It's quick and immediate, making it especially suitable if you have a limited number of sources.
- Advanced Source Retrieval: This option offers much more powerful search capabilities. It can retrieve the right sources even in the presence of extensive documentation. However, it can slow down the response time by up to 1-2 seconds, depending on various factors
⚠️⚠️⚠️ Prompt: This is one of the MOST IMPORTANT steps you need to take. Prompt engineering will require some 'trial and error,' and you might need to iterate on it several times. We offer some standard prompts for inspiration, but we strongly suggest that you reiterate and work on your own prompt. Some tips:
- Tell the chatbot who it is and how to respond (e.g., 'You are the AI sales assistant at CompanyName').
- Provide your email address or a contact in case users need further assistance. (e.g., 'Calendly link').
- Avoid being too detailed or adding too many rules.
- The clearer the prompt, the easier it will be for the chatbot to follow your rules.
Leads collection Settings: In this section, you define the rules for asking users for their contact information. When activated, this feature will prompt a message after the chatbot answers the user's question, displaying a form to collect the information you wish to gather. To activate this function, simply select the information you want to collect, choosing one, two, or three options from: Name, Email, Phone Number.
You can customize the wording of the form to ask for user information and decide after how many 'bot messages' to display it—the count starts with the introductory message!
Escalate to Human: Do you want the chatbot to automatically detect if a user needs to talk to a human? If so, activate this option. When users express a need like 'I need to talk with human support' or something with a similar meaning, the chatbot will display an email form to collect the user's email using the custom text of your choice. Also, add the email address where you want to receive the summary of the conversation.
Remember to SAVE your changes.
Chat Display Name: This is the name that will appear at the top of the chatbot.
Title Icon: If added, an icon will appear just before the Chat Display Name.
Bubble Background Color: This setting determines the color of the chatbot's bubble background. When the chatbot widget is closed and if there is no 'Bubble Icon' (as detailed below), a colored bubble displaying a message icon will be shown. When the widget is opened, the same color will be used for the bubble background, and an 'X' will appear on top of it to close the chatbot.
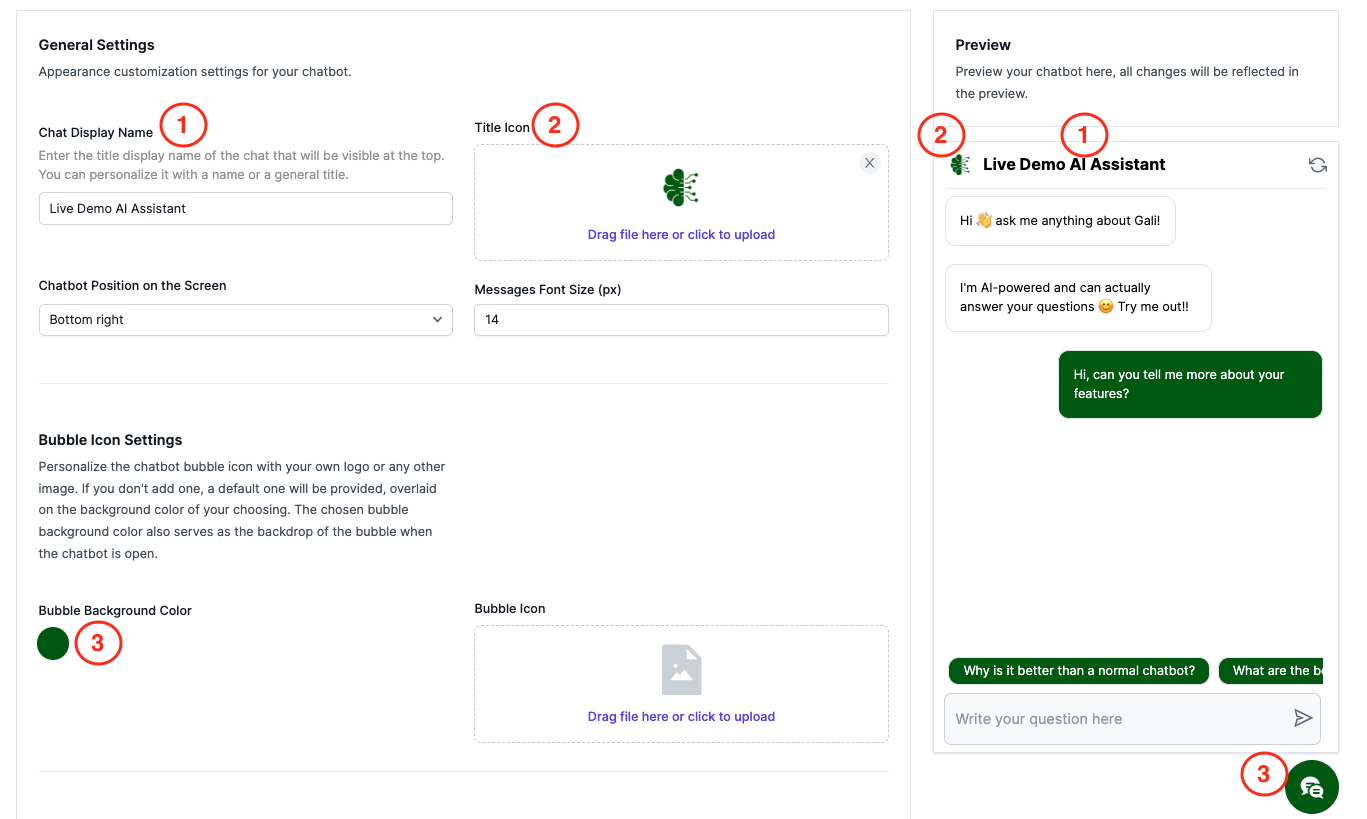
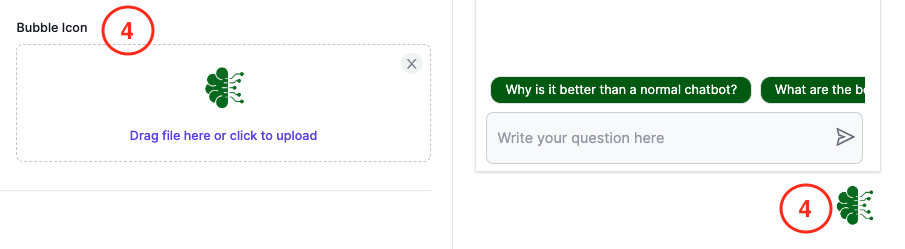
Bubble Icon: If you add a Bubble Icon, it will be displayed when the chatbot widget is closed. You can preview it in the chatbot's appearance settings to ensure it looks great.
Bot Messages Appearance:
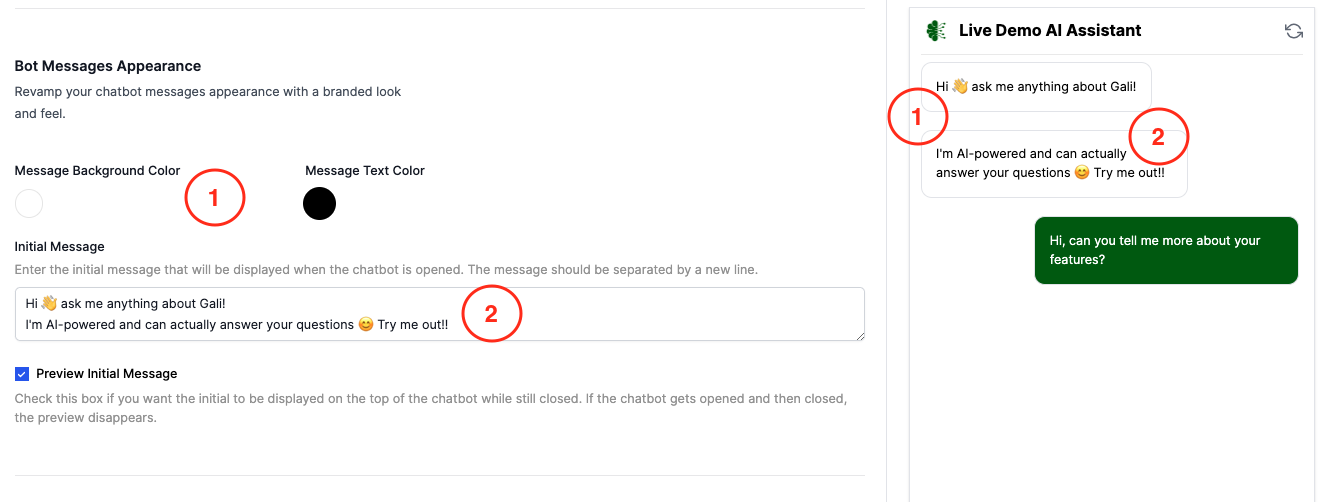
- Message Background Color: This is the color of the background of the bot's messages. We suggest a light color for easier readability, but feel free to customize it as you see fit.
- Message Text Color: This refers to the color of the text in the bot's messages. Ensure that it contrasts well with the background color for readability. Typically, light text on a dark background or dark text on a light background works best.
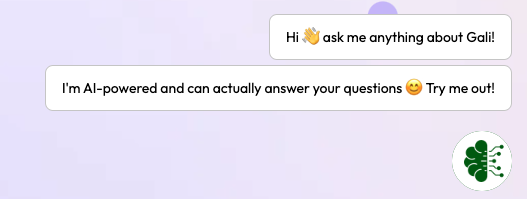
- Initial Messages: These are the chatbot's opening messages. Each line you enter will be sent as a separate message. You can two messages to capture the users' attention more effectively.
- Preview Initial Message: If this option is enabled, the initial messages will be displayed as a preview when the chatbot widget loads on a webpage. Users can click on the text to open the chatbot, or close it using the small "X" at the top right.
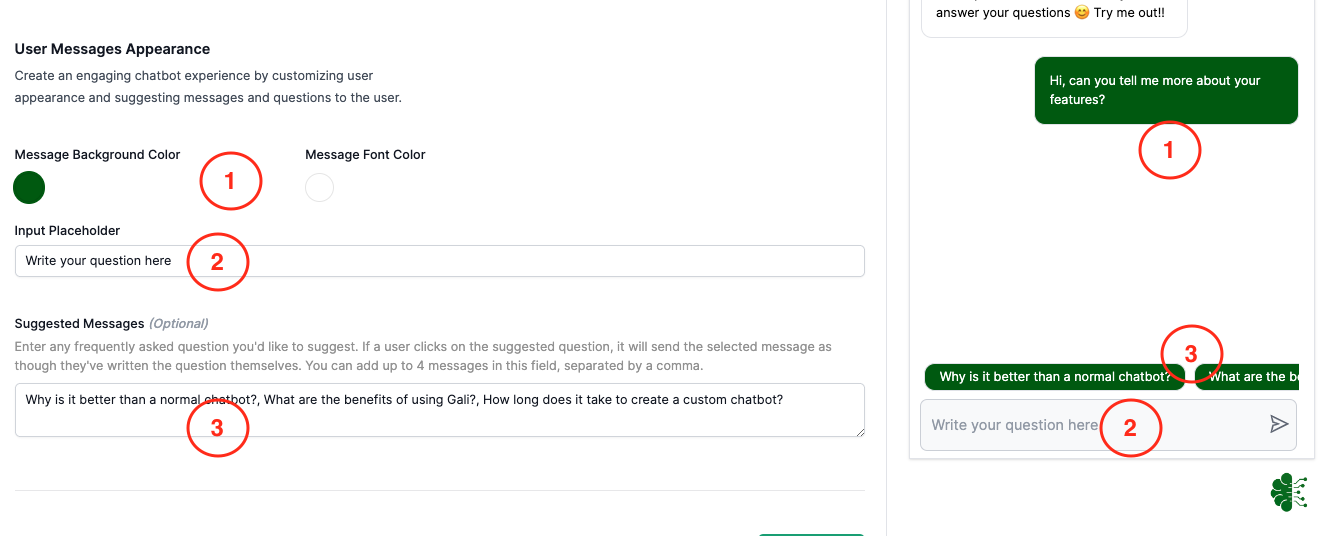
User Messages Appearance:
- Message Background Color: This is the color of the background of the user's messages.
- Message Text Color: This refers to the color of the text in the bot's messages. Ensure that it contrasts well with the background color for readability. Typically, light text on a dark background or dark text on a light background works best.
- Suggested messages: In this section, you can add the questions or messages that you wish to suggest to users. Each message should be separated by a comma and will appear as an individual suggested message. Tips: Consider adding frequently asked questions or intriguing ones whose answers you think your users would find valuable.
Remember to SAVE your changes.
From a websites
You can add content from your website directly as a source in three ways:
- Sitemap: Add your website's sitemap directly, and we will retrieve all the links. If you're unsure how to do this, here's a link for guidance, but we advise checking your website builder’s CMS/settings.
- Crawling: Add a webpage to crawl all the links starting from that address. Please note that this operation can take a few minutes, depending on the number of pages to crawl.
- Single Pages: Add one or more webpages manually.
Pro Tip: Terms of Service (ToS) and Privacy Policies (PP) are often excluded to avoid adding unnecessary material not strictly related to your core sources.
Add your documents
Simply drag and drop your files and documents into the area on the right. Allowed formats include txt, md, pdf, doc, ppt, and html, with a maximum size of 5MB per file.
Please note that the actual character count from a specific source will be determined during the training process.
Remember to click on 'Retrain Chatbot' every time you change any of the sources!
Before publishing your chatbot, it's important to test it to ensure it responds as expected. Visit the 'Try It Out' section and ask some questions. If you need to refresh the chat, you can use the 'Refresh Chat' icon located at the top right.
Remember, every time you make any changes, be sure to 'Save Changes' and/or 'Retrain Chatbot' if you have altered the sources.
This step is crucial for fine-tuning the prompt, the sources, and the chatbot's appearance.
Go to the 'Embed' section, and copy the code either as a widget – the small dot with previewed messages you see on our homepage – or as an iframe–the section visible on our FAQs page.
Embedding a chatbot is extremely straightforward and requires no coding skills. Simply copy the code we provide and add it to your HTML page, or a website builder like WordPress or Webflow, and then publish it. We have created some guides for assistance if you need any help!
Install as HTML guide
Install into Webflow
Install into WordPress
Congrats! Your new custom AI chatbot is live–have a look at it and test it live!
Next, monitor your chatbot's chats history and leads collected from the dashboard.
If you are on a plan with integrations, you can also set up some Zaps to link your chatbot to your tech stack via Zapier. Here more info about the Gali AI integration on Zapier!